IIS Transform Manager Beta – Using the MP4 to Smooth Task
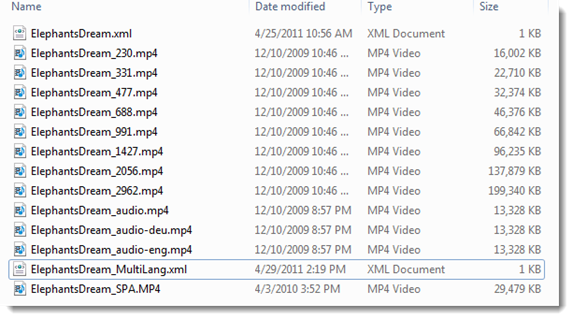
To use the new MP4 to Smooth Task you need to start out with a set of multi-bitrate encoded MP4 files that meet the requirements for Smooth Streaming encoding:
That means you can use your favorite encoder that can generate H264 and AAC MP4 files (there are a lot of those out there!) as long as you make sure to set them up to create GOP aligned (or Coded Video Sequence aligned for you fellow video nerds) files.
To do that you need to stick to some advanced settings in your H264 encoding tools:
- Make sure that if you switch framerates at lower resolutions, you only use EXACT half framerates of your upper resolutions (for example 29.97 and 14.985)
- Set you KeyFrame Min and Max distinance to 2 Seconds per your framerate
- Disable any forced I-frames at Scene cuts. Usually this is referred to as scene detection or --no-scenecut in x264
- If you are using X264, output your stats file from your first pass and feed it into your second pass.
For example, the following settings worked for me when I used X264 to generate MP4 files using an AVISynth script.
x264.exe --pass 1 --bitrate 2962--ssim --output NUL --profile high --preset slower --tune film --stats ".stats" --keyint 48 --min-keyint 48 --no-scenecut ElephantsDream.avs
x264.exe --pass 2 --bitrate 2962--ssim --output "MP4\%~n1_2962.mp4" --profile high --preset slower --tune film --stats ".stats" --keyint 48 --min-keyint 48 --no-scenecut ElephantsDream.avs
After you have your folder of .MP4 files you can then use the new Watch Folder called “MP4 Video Files files to H.264 Smooth Streams” that is available in the IIS Transform Manager Beta.
Just Enable and Start this new Watch Folder after modifying the Folder Path that you want to use for it.
Next click Explore Watch Folder in the Actions menu (or right click and select Explore Watch folder). This will open the Watch folder up in Explorer view.
Before we drag our files into this view, we first need to create a “playlist” XML file in SMIL 2.0 format that will be used by Transform Manager to bind the MP4 files that you drop into the folder into a single Smooth Streaming package.
To do this, open up your favorite XML editor and create a basic SMIL 2.0 file with a <body> and <seq> element. Watch out for extra whitspaces in front of the <?xml> element at the head of the file! Inside the <seq> element you list the <video> or <audio> tracks that you wish to use from your MP4 files.
You simply point the Video element’s “src” attritbute to your multiple MP4 source files and the audio element to the specific MP4 file that contains the audio track you want to use in the remux.
<?xml version="1.0" encoding="utf-8"?>
<smil xmlns="http://www.w3.org/2001/SMIL20/Language">
<body>
<seq>
<video src="ElephantsDream_1427.mp4"/>
<video src="ElephantsDream_2056.mp4"/>
<video src="ElephantsDream_230.mp4"/>
<video src="ElephantsDream_2962.mp4"/>
<video src="ElephantsDream_331.mp4"/>
<video src="ElephantsDream_477.mp4"/>
<video src="ElephantsDream_688.mp4"/>
<video src="ElephantsDream_991.mp4"/>
<audio src="ElephantsDream_audio.mp4"/>
</seq>
</body>
</smil>
If you have multiple language audio files, you can also use the systemLanguage attribute on the <audio> element to set the language tag that will be used in the Smooth Streaming manifest. For example, the playlist below uses the systemLanguage attribute to add a Spanish and English audio track.
This will generate two separate .isma audio tracks and the appropriate manifest entries in the Client and Server manifests.
<?xml version="1.0" encoding="utf-8"?>
<smil xmlns="http://www.w3.org/2001/SMIL20/Language">
<body>
<seq>
<video src="ElephantsDream_1427.mp4" />
<video src="ElephantsDream_2056.mp4" />
<video src="ElephantsDream_230.mp4" />
<video src="ElephantsDream_2962.mp4" />
<video src="ElephantsDream_331.mp4" />
<video src="ElephantsDream_477.mp4" />
<video src="ElephantsDream_688.mp4" />
<video src="ElephantsDream_991.mp4" />
<audio src="ElephantsDream_SPA.mp4" systemLanguage="spa" />
<audio src="ElephantsDream_audio-eng.mp4" systemLanguage="eng" />
</seq>
</body>
</smil>
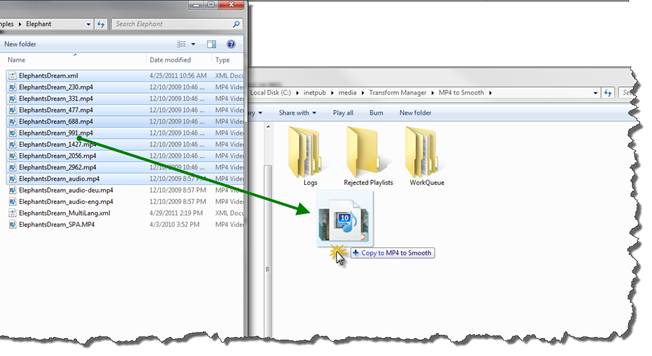
Finally, you drag all of your MP4 files and your new XML playlist into the Watch Folder to kick off the remux job.
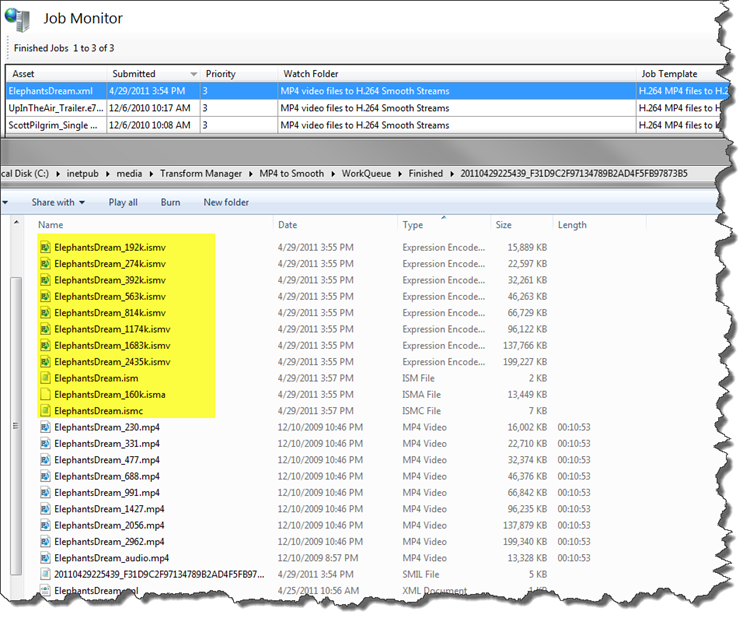
After a short period of time the Job Monitor will show the progress of the conversion.
You can select the Activity Log tab in the Job Details panel to see the detailed progress log.
After the job has finished and you will be able to locate your job in the Finished folder in the Job Monitor view of Transform Manager.
Just double click on the row for your Finished job and it will open up the location of the Finished Folder for your Job ID that will contain your generated Smooth Streaming content. If you want to automate the copying of the output content to a final location on disk, or to another server you can add the RoboCopy Task to the default MP4 To Smooth Job Template and supply the location details on where you want your copy to go.
The new MP4 to Smooth makes it very simple to use a lot of existing encoding software that supports standard MP4 files with H.264 and AAC to generate Smooth Streaming content quickly and easily. This can also be handy when you need to generate MP4 files for HTML 5 progressive download playback in browsers, and also want to quickly and easily add Adaptive HTTP Streaming with Silverlight.


