Installing SQL 2012 Server for Reporting Server
In my previous post, I walked you through the installation of a SQL 2012 Server. Today, I’ll explain how to install SQL 2012 for Operation Manager Data Warehouse. This long-term data warehouse database is used by the OpsMgr 2012 SP1 Reporting Server. Once SQL installation is completed, we’ll configure the SQL Reporting Services and validate that it’s functioning correctly.
How to Install SQL Server 2012
This installation is similar to SQL Server installation: you select the same options you did for the SQL Server, and then select the reporting service. Once the service is installed, you’ll configure it.
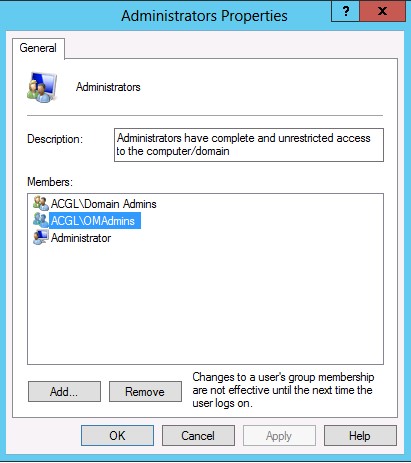
Open a session with Administrator on MTLRS01 Server (or whatever name you’ve given to your server) and add the OMAdmins group in the Administrators local group of the server. You can also add any other groups or user that you would like to give admin rights to.
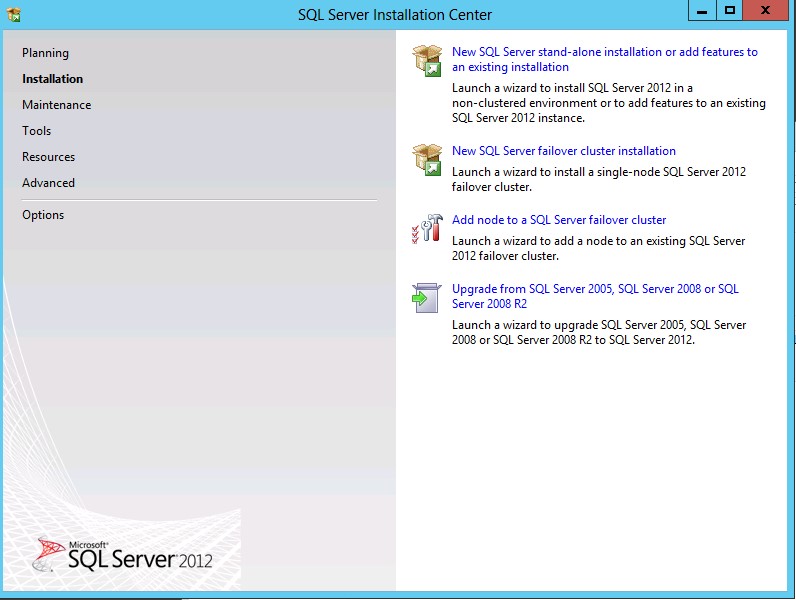
Close the session and open a new one with the OMAdmin user or any user that is an administrator of the reporting server. Click Setup and Installation. Once you’re in the SQL Server Installation Center, click New SQL Server stand-alone installation or add…
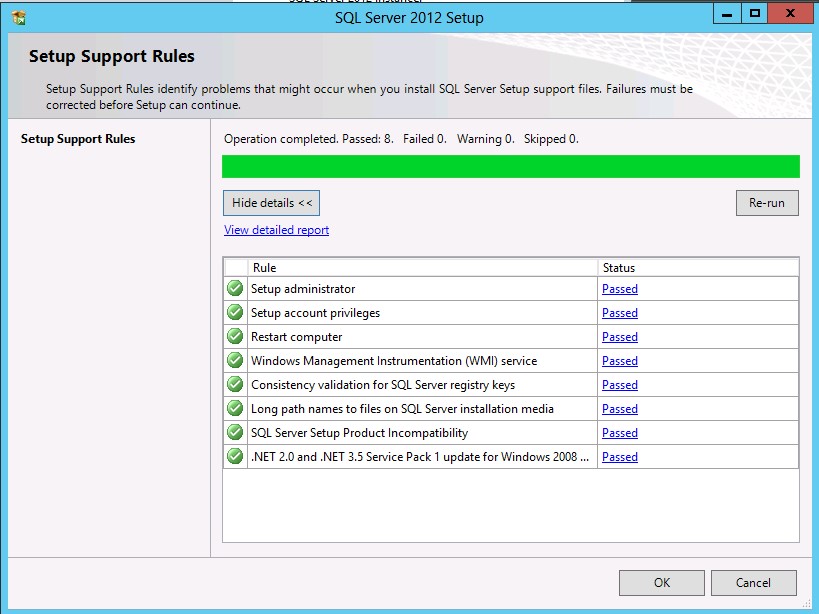
In Setup Support Rules, click Show Details. Validate that all statuses are passed and click OK.
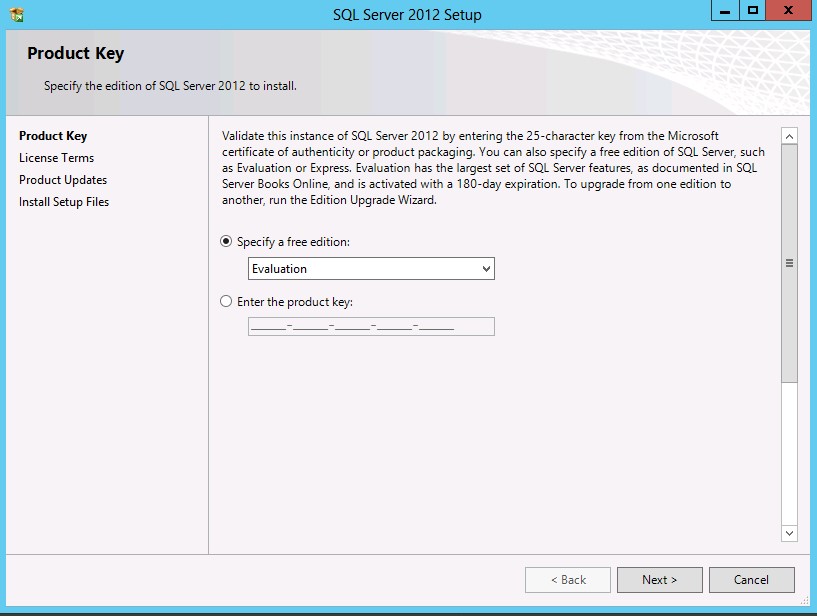
If you have an evaluation or a serial number, select Specify a free edition, then select Evaluation or Serial Number. Then select Enter the product key, type your product key and click Next. Select I accept the licence terms. If you want to send usage data to Microsoft, also select Send feature usage data to Microsoft and click Next.
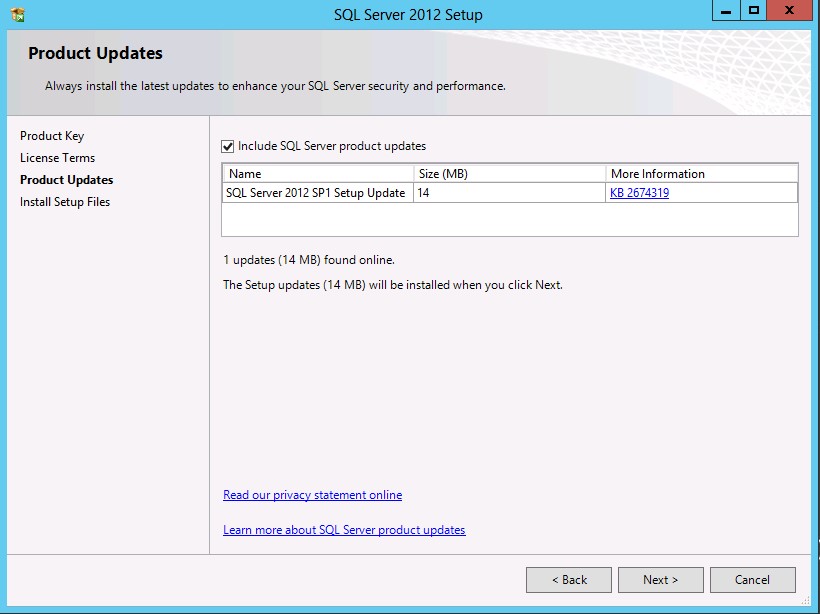
If you want to install the product update, select Include SQL Server Setup Update. The update will automatically download and install. Again, click Show Details to ensure that all statuses are passed before you click Next.
In the Setup Role section, select SQL Server Feature Installation and click Next.
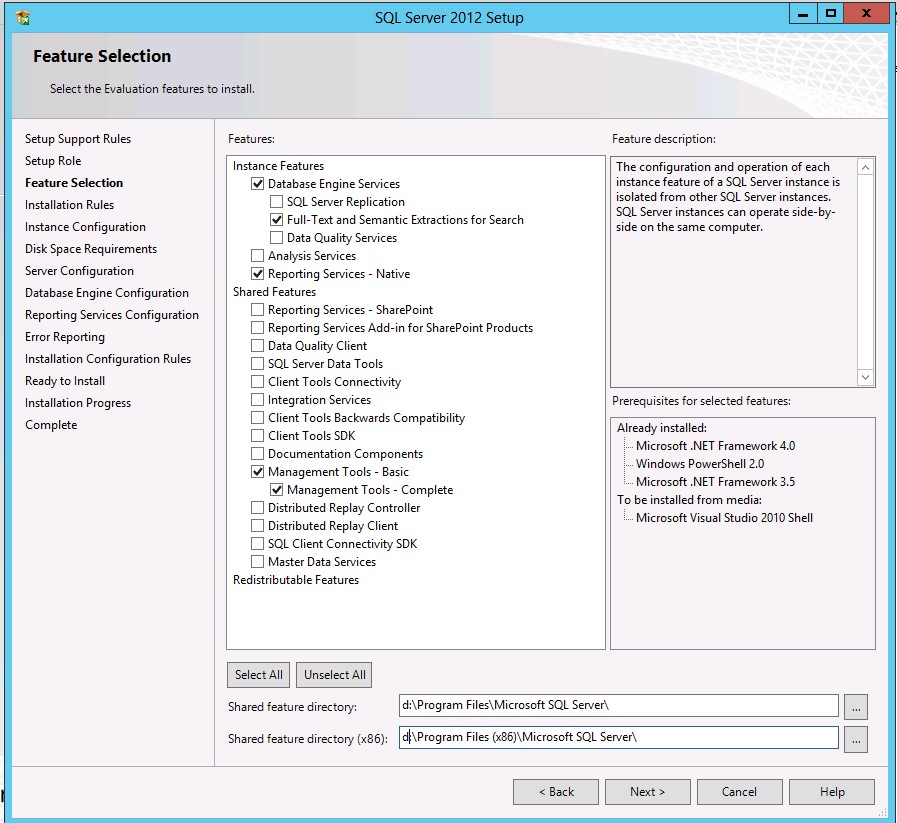
This server will be used only by the Operations Manager Reporting Database (data warehouse) and is the long-term database. Select the following: Database Engine Services, Full-Text and Extraction…, Reporting Services – Native, Management Tools Basic and Management Tools – Basic. This will install all the tools required to manage the SQL Server. Replace the C: path by D: or any other disks and click Next.
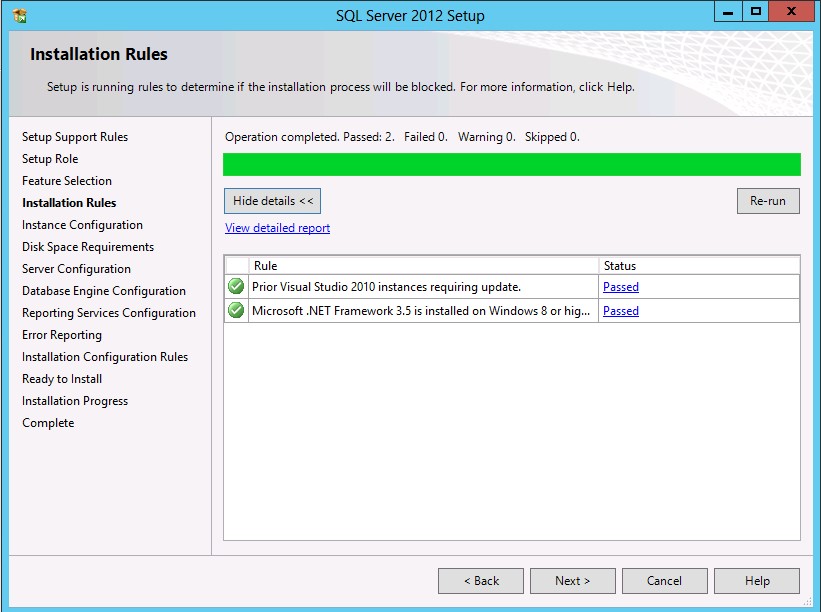
Click Show Details and validate all statuses are passed before you click Next.
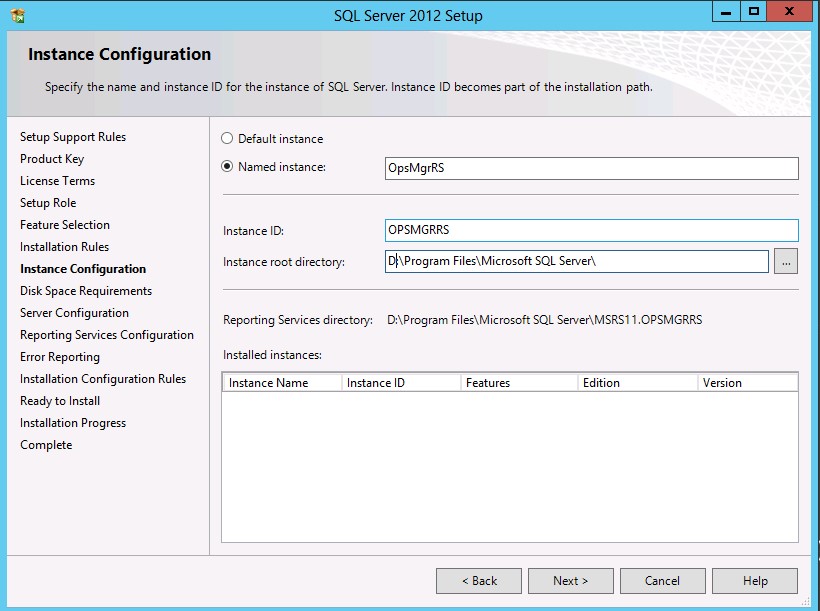
In the Instance Configuration section, enter OpsMgrRS in the Name instance field. You can also install SQL without any instance. Change the Path to D: and click Next. You’ll then access the Disk Space Requirements window. Click Next.
For both SQL Service Agent and SQL Server Database Engine, select SRVCSQL user. This is only a domain user and it has no Administrators right on the SQL Server. Make sure to set the Startup Type to Automatic for both services. For the SQL Reporting Services, select OMDWR user. Then select the Collation tab.
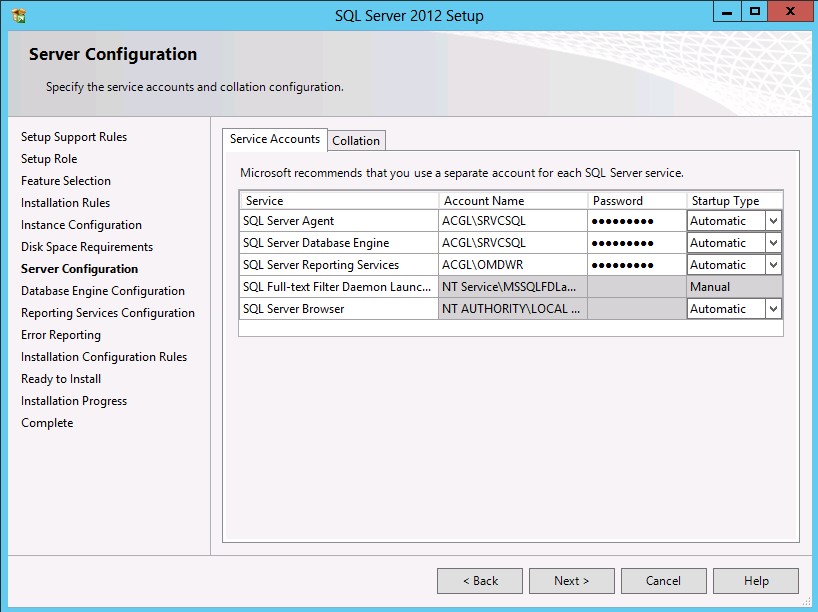
You can use the default which is SQL_Latin1_General_CP1_CI_AS, or choose another supported collation. Then click Next.
Note: The Collation cannot be changed after SQL installation: it‘s very important to select the collation that is supported.
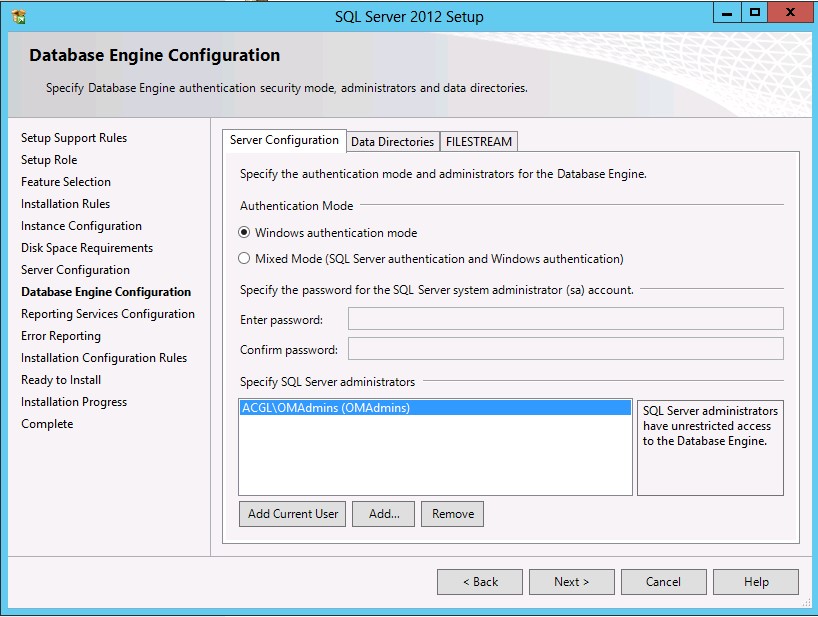
In the Database Engine Configuration window, select Windows Authentication Mode click Add and select the OMAdmins group or admin user needed to install the reporting server. Click Next.
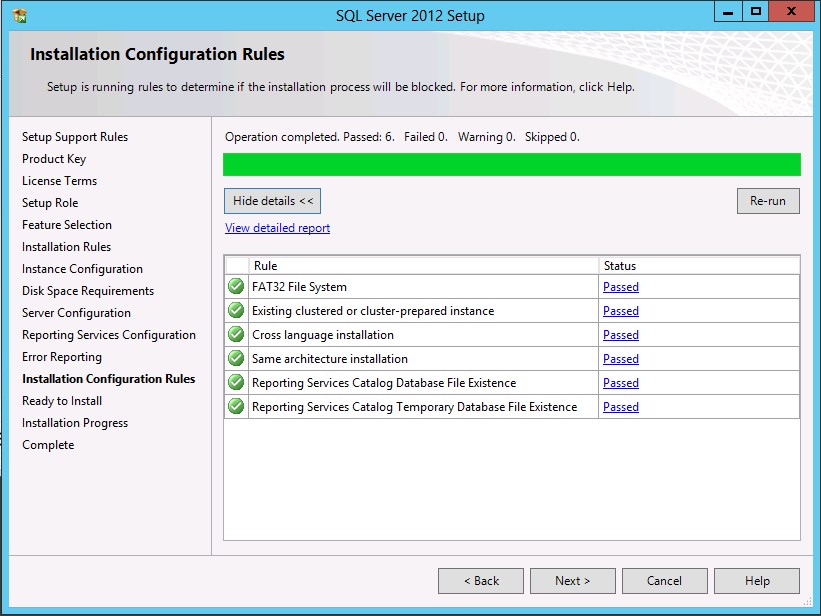
In Reporting Services Configuration, select Install Only and click Next. Click Next Again in Error Reporting until you get to the Installation Configuration Rules. Then select Show details. Once you’ve ensured that all statuses are passed, click Next.
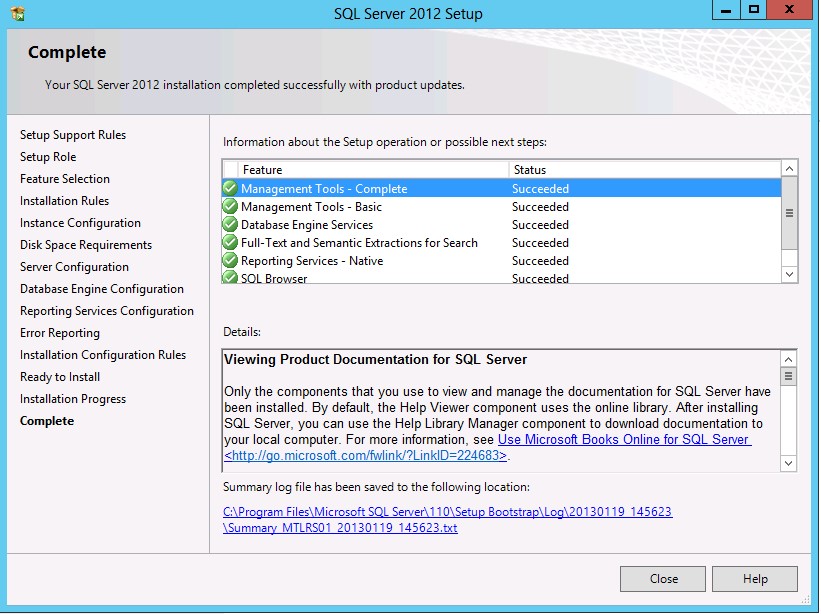
When you get to the Ready to Install section, click Install and wait until all statuses read Succeeded before you click Close.
Validate that SQL is working
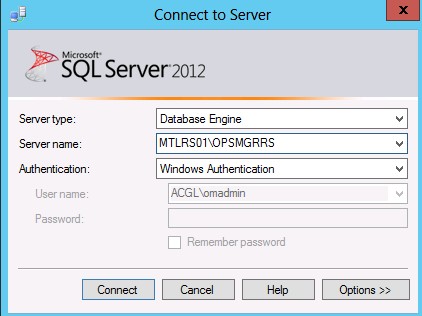
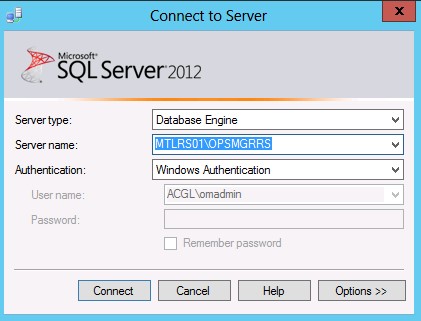
On MTLRS01 server, your session is open with OMAdmin user. Press the Windows Key and select SQL Server Management Studio. Then select Server Name MTLSQL01\OPSMGRRS and click Connect.
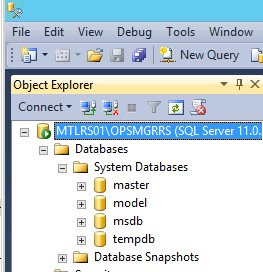
Once you are connected, expand the Server, Databases and System Database. Then validate that the 4 databases are created and mounted. The SQL Reporting Server Database are not created yet.
Configuring SQL reporting Services
In this section, we’ll configure and create the SQL reporting Service Database, which will be used to save all OpsMgr Reports.
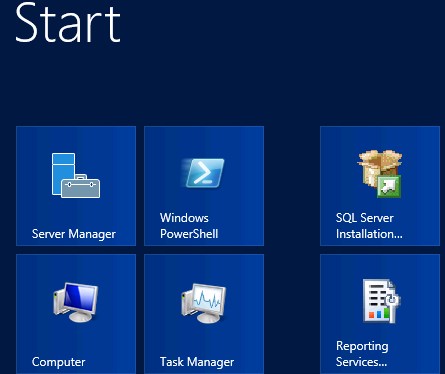
On MTLRS01 Server, your session is open with OMAdmin user or any other user you used to install the Reporting Server. Press the Windows Key and select Reporting Services. If the Reporting Services is not there, ensure you pin it to the Start menu.
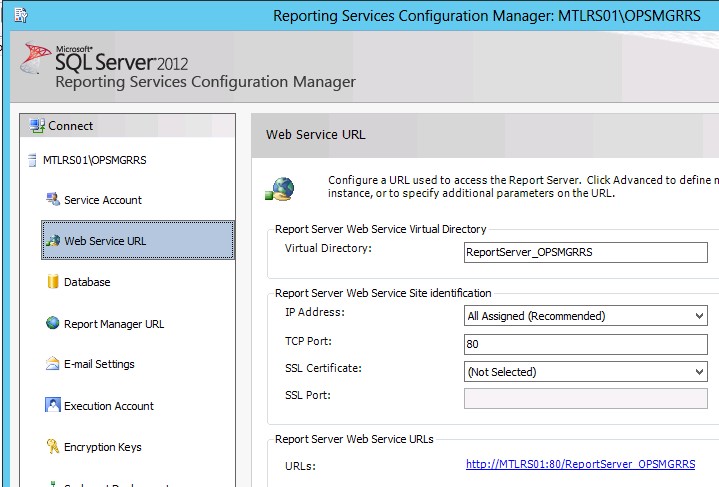
Connect to the server and click Service Account. Validate that the current domain user is an administrator of the Reporting Server.. Click Web Service URL to accept the default URL and click Apply. Then validate that the URL was created and click Database and Change Database.
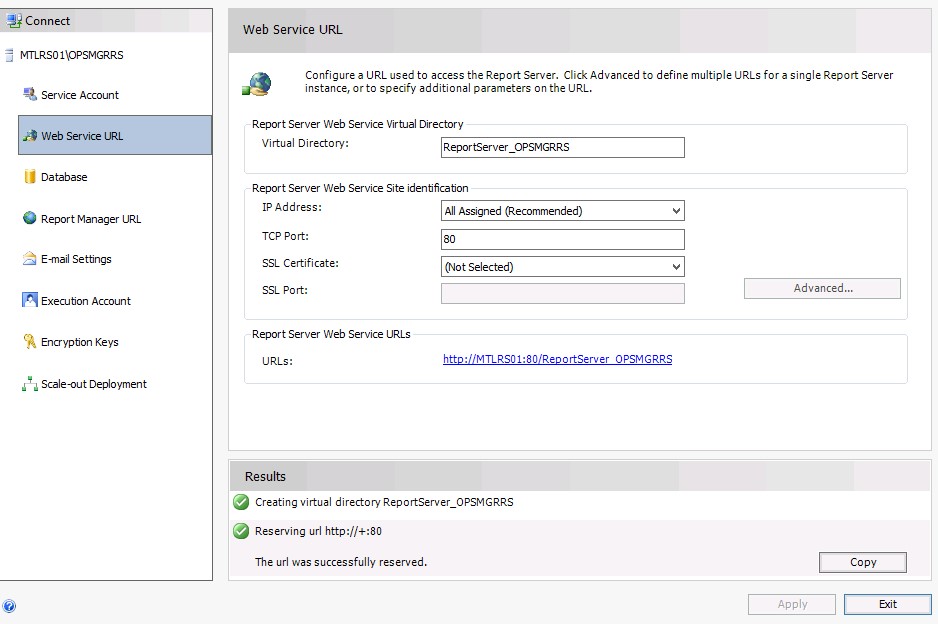
Select the Create a new report Database and click Next. Double-check the Server Name field corresponds to MTLRS01 \OpsMgrRS and click Test Connection. You will get the confirmation message Test Connection Succeeded to confirm the connection is working properly. Click OK.
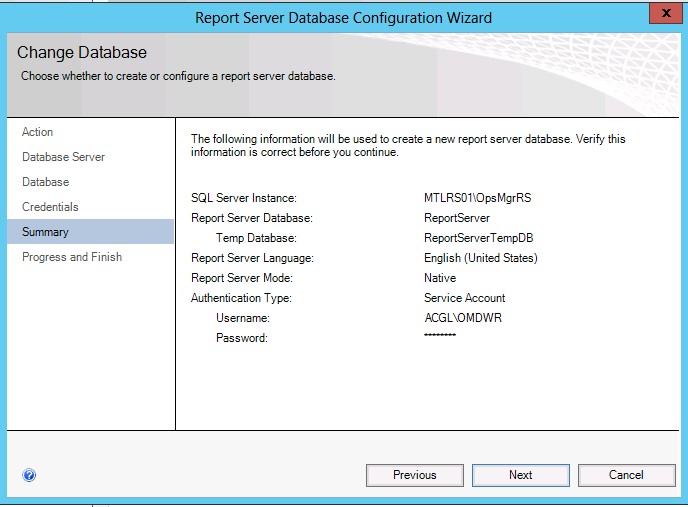
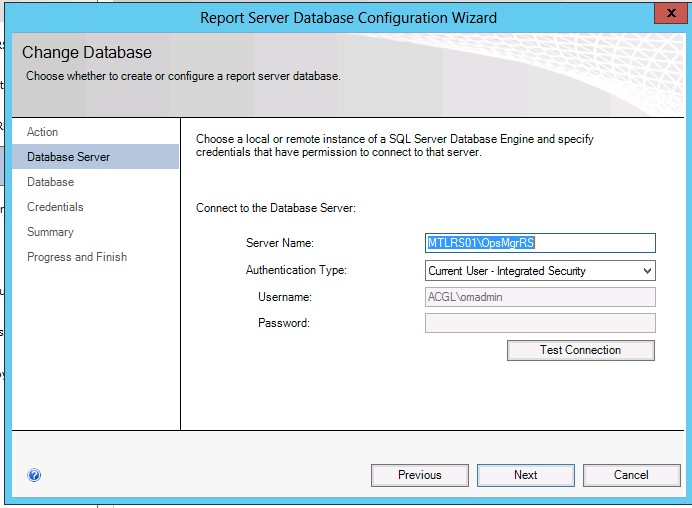 Double-check that the Server Name still reads: MTLRS01\OpsMgrRS and click Next. Accept the Default and click Next. Click Next again and you will access the Summary window. Validate that everything is OK and click Next.
In the Progress and Finish window, ensure that all statuses are Success before you click Finish. Select Report Manager URL and accept the default by clicking Apply.
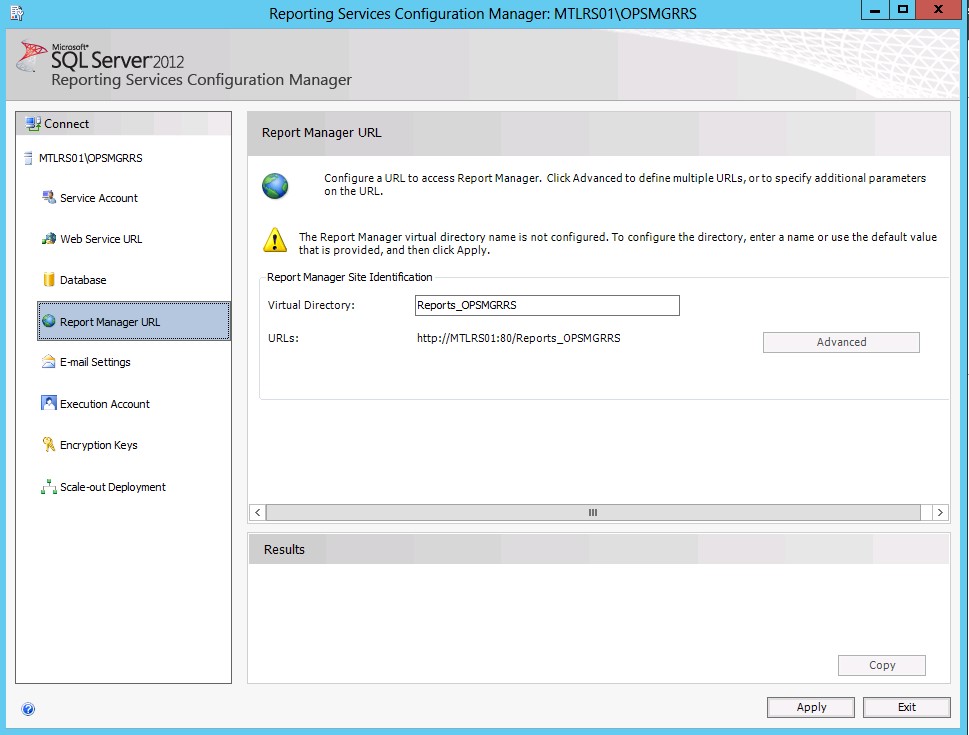
To validate that the URL was created, double-click on the URL: http://MTLRS01:80/Reports OPSMGRRS01.
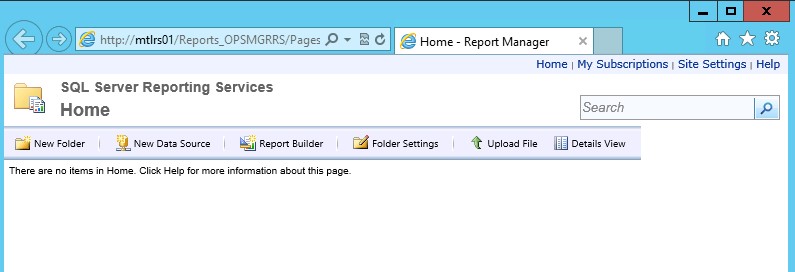
The SQL Server Reporting Services Home will open. Return to Web Service URL and click on URL http://MTLRS01:80/ReportServer_OPSMGRRS. The Microsoft SQL Server Reporting Services will open, validating that the SQL Reporting Services is working.
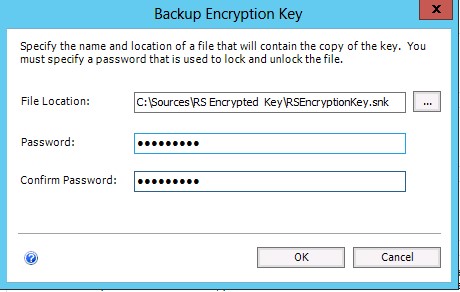
In the Encryption Keys section, click Backup. In the pop-up window, type in the File Location of the Encryption Key: C:\Sources\RS Encrypted. Enter a password and confirm it. Ensure that this file is taken by your backup and click OK
Start by opening SQL Server 2012 Management Studio, and ensure that the server name and the instance are there. Here it’s MTLRS01\OpsMgrRS.
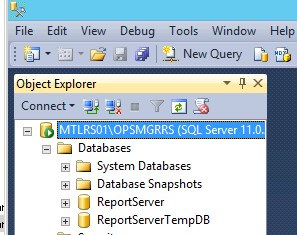
Expand MTLRS01 and expand Databases. Validate that both ReportServer and ReportServerTempDB databases were created as we can see below. Install the Last Service pack and Cumulative roll up for SQL 2012 before you install OpsMgr 2012.
Congrats, your SQL Reporting Server is now installed!
The post Installing SQL 2012 Server for Reporting Server appeared first on SherWeb.