WebPlaylists: A Role-based Custom Provider
** UPDATED on 7/24/2008 for use against Web Playlists Go-Live... **
By default, playlists for our Web Playlists feature are defined in an xml-based file with an .isx extension. Though this is really useful and allows dynamic manipulation of an entries location via 'httpd://' and/or serverVariables (the topic of a future blog), it is still pretty static in that the number of entries is pre-defined and it doesn't allow you to modify attributes such as 'canSkipForward' or 'canSeek' on the fly.
Web Playlists CTP2 exposes an API that allows users to develop their own custom playlist providers to create web playlists dynamically. This is extremely powerful when mixed with any Membership/Role Manager provider. For the purposes of this sample, I used the Asp.Net Membership and Role Manager provider and created a custom Web Playlist provider that generates a different playlist based on a user's Role, as follows:
- Anonymous user: This user is not registered on your site. This user's playlist will consist of the following 3 entries:
- A brief ad to generate revenue
- A 20-second teaser of the requested video
- A 10-second video encouraging the viewer to join the site
- Non-paid user: This user is registered, but does not have a paid subscription. This user's playlist will consist of the following 2 entries:
- A brief ad to generate revenue
- The full-length version of the requested video
- Paid user: This user is registered and has a paid subscription. This user's playlist will consist of only 1 entry:
- The full-length version of the requested video
The custom playlist provider first determines who the user is and then builds the playlist specific to the role that the user belongs to. One can add logic to send ads or other video content targeted to this specific user based on their location, interests or whatever other information they have stored for that user in the Membership database.
You can download the attached .zip file here: http://blogs.iis.net/bobbyv/attachment/2407899.ashx .
Setting up the application
Prerequisites:
This walkthrough assumes the following:
- You have a Windows Server 2008 machine. (Vista SP1 should also work)
- IIS is installed
- ASP.Net is installed
- Sql Server 2005 is installed. At minimum, we require Sql Server Express 2005 to serve as the Roles/Membership provider. Sql Server 2005 Express can be installed from the following link: http://www.microsoft.com/express/sql/download/default.aspx
Create an Application named 'MyApp'...
- After downloading the attached .zip file, extract its contents to a folder named 'MyApp' below your 'Default Web Site'.
- Open the IIS 7.0 UI by typing 'inetmgr' from a command prompt or the 'Run' window
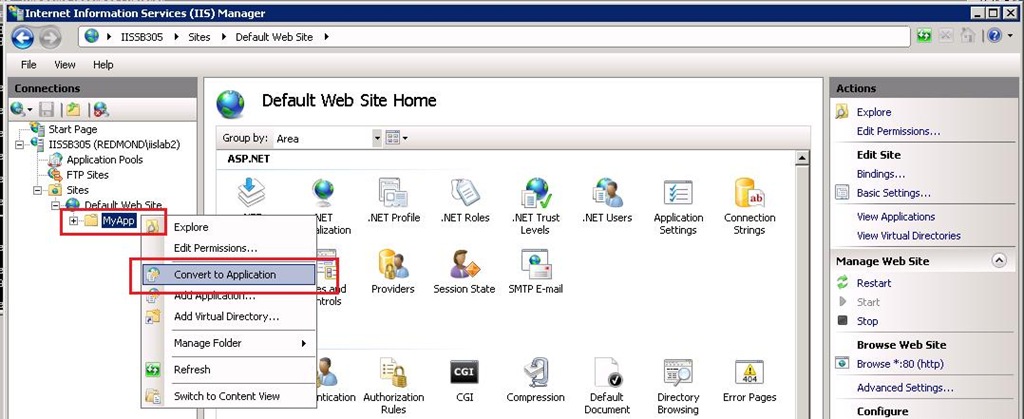
- Browse to the 'MyApp' node beneath the 'Default Web Site', right-click on it and select 'Convert To Application'
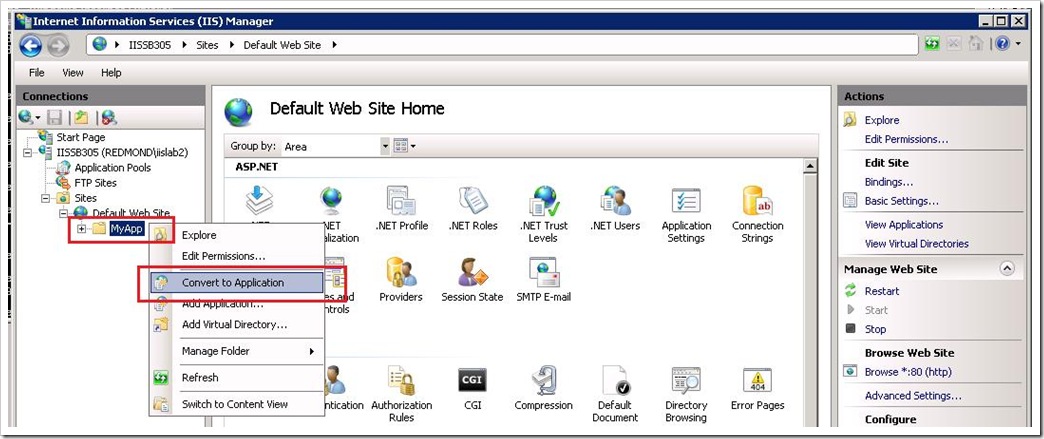
- Accept the default values by clicking 'OK'.
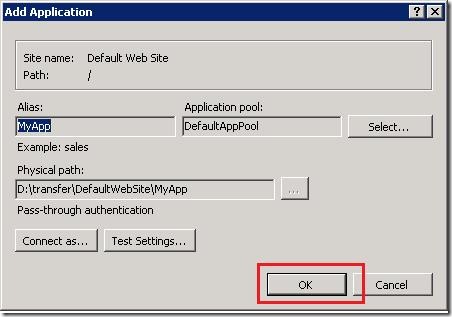
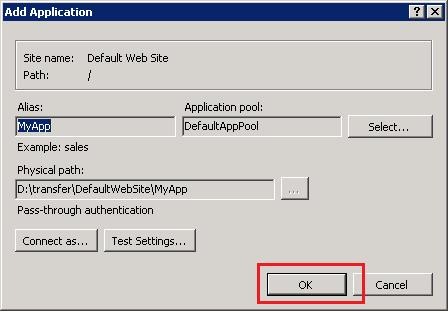
You have successfully created the application named 'MyApp'.
Creating the Users and Roles...
The next step is to create the necessary Users and Roles for the application.
- In a command prompt, browse to your 'MyApp' directory and create a folder named 'App_Data'.
- Give the 'Network Service' account 'Write' permissions to the 'App_Data' directory. You can execute the following command to achieve this:
icacls App_Data /grant "network service":(OI)(CI)(RX,W)
- Open IE (or the web browser of your choice) and browse to:
http://<machineName>/MyApp/setup.aspx
Don't forget to substitute the placeholder <machineName> with the name of your machine.
If you now look inside your 'App_Data' folder, you should see the following two files:
- AspNetDb.mdf
- AspNetDb_Log.ldf
You have successfully created the necessary users and roles. You can test it out by browsing to http://<machineName>/MyApp/default.aspx . In the upper right-hand corner, you can use the following accounts to login:
| Role | UserName | Password |
| NonPaidUser | user1 | aaa_111 |
| PaidUser | user2 | bbb_222 |
Setting up the custom Web Playlists provider...
Before we can configure our custom provider, we need to compile it from the source code.
- In a command prompt, browse to the 'customProvider' directory below 'MyApp'.
- Add the .Net Framework directory to your %path% variable:
path=\Windows\Microsoft.NET\Framework\v2.0.50727;%path%
- Compile the custom provider:
csc.exe /r:plTypeLib.dll /r:System.Web.dll /debug:full /out:RoleBasedPlaylistProvider.dll /target:library RoleBasedPlaylistProvider.cs
- Register the assembly in the registry:
regasm.exe /codebase RoleBasedPlaylistProvider.dll
Now that we have compiled our custom provider, we need to configure it in the Web Playlists feature:
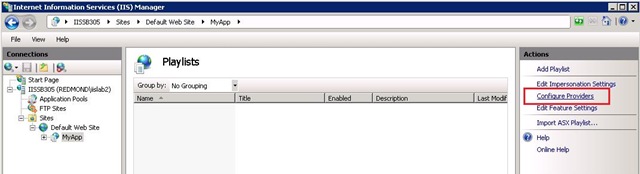
- In inetmgr, open the 'Web Playlists' feature for the 'MyApp' application and click the 'Configure Providers' action...

- On the 'Playlist providers page', click on the 'Add...' action.

- On the 'Add Playlist Provider' form, input the following values:
- File name extension: .rbisx
- Description: <leave blank or enter your own value here>
- Program Id: SamplePlaylistProvider.RoleBasedPlaylistProvider
- Ensure the checkbox for 'File based handler' is checked...
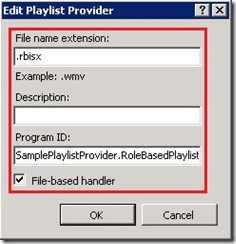


and click 'OK'.
Enabling Asp.Net's FormsAuthentication module for native code handlers...
This is the key step in getting Asp.Net's FormsAuthentication module to work with our Web Playlists feature. The IIS 7 integrated pipeline only loads managed modules when a managed-code file handler handles the request. Web Playlists uses a native code file handler so we need to remove the precondition from the FormsAuthentication module so that it will get loaded even on requests to our native handler.
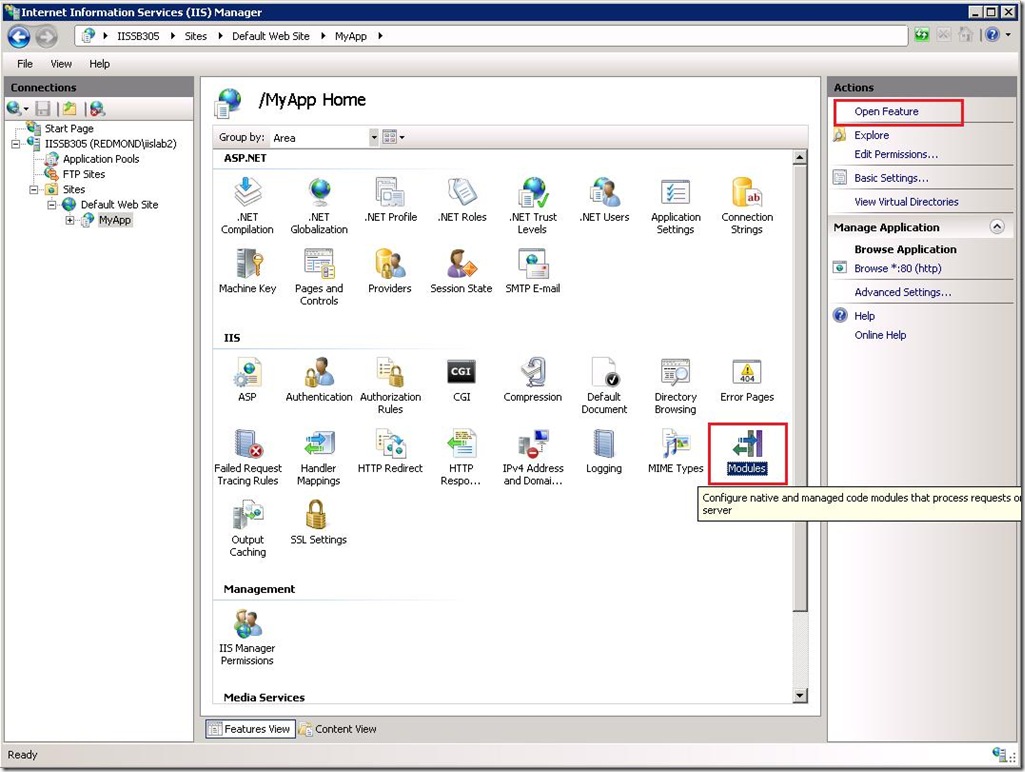
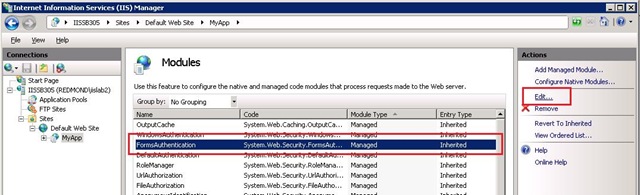
- Go back to the "MyApp" home, select the "Modules" feature and click on the "Open Feature" action.
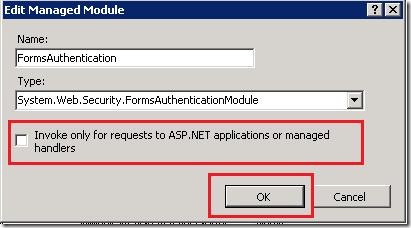
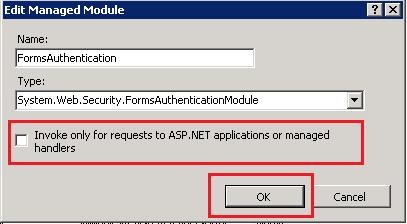
- Select the "FormsAuthentication" module from the list and click on the "Edit..." action...
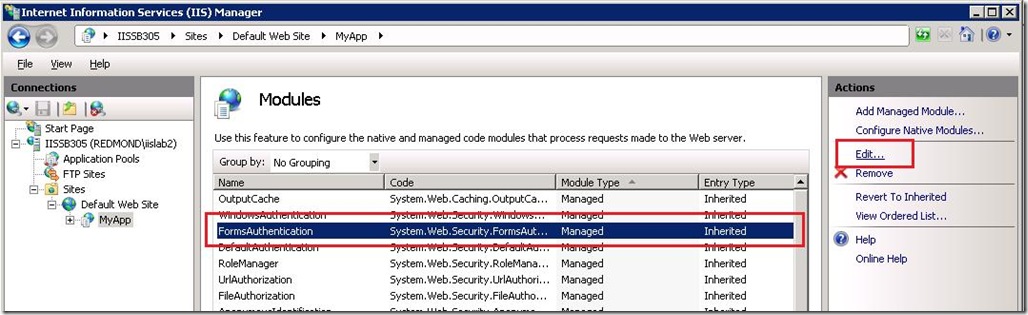
- Uncheck the checkbox to "Invoke only for requests to ASP.NET applications or managed handlers" and then click "Ok".

You have successfully enabled FormsAuthenthentication managed-code module for native-code handlers.
Seeing the Role-based Custom Web Playlists Provider in action...
The application and the custom Web Playlists provider are now setup. To see this in action:
- Make a request to the default.aspx page.
- Click on one of the trailer screenshots at the bottom of the page as the anonymous user.
- Now login using the 'NonPaid User' credentials above and click on the same trailer screenshot as in step 2.
- Repeat step 3 using the 'Paid User' credentials above and click on the same trailer again.
You should notice that the video playlist returned is different for each user, as described earlier.
Please let me know if you have any questions or comments. A future blog will discuss the details of the custom provider code in further detail.